I pulled down my sewing machine today with the intention of getting a lot of sewing done. I had a few things to mend - I started by reattaching a collar to one of Mara's shirts that she just outgrew. I looked at the pair of my shorts that needed to be fixed, but decided I was too lazy to fill a bobbin with black thread, so I pulled down Steve's quilt.
I pinned the blocks to the sashing, and started sewing. Then came the "help". Mara noticed I was sewing first. She climbed up on the chair with me. Not content to sit in my lap, she instead climbed behind me and pushed me forward so she could stand and look over my shoulder. Gabriel noticed I was sewing and wanted to be in charge of the foot pedal. He couldn't reach, so we compromised; he sat in a chair next to mine and pushed down my foot with his.
As you can imagine, this made the whole experience very... enjoyable.
This is what happens every time I sit at my sewing machine.
While I enjoy teaching my kids how to do things, sometimes I just want to do them. Without having to stop every few seconds to explain.
Showing posts with label sewing. Show all posts
Showing posts with label sewing. Show all posts
Tuesday, October 30, 2012

Tuesday, September 25, 2012
Owl Giveaway! Day 2
After making the Owl Mobile, I just had to do more things involving owls. I am not obsessed with owls myself, so owl things would just sit around, neglected, if I kept them. This is where you come in.
The Rules
Each day from September 24 to September 26, I will be posting owly things that I have made, that you could win. That is right, there will be three prizes that you could potentially win. To win, follow the instructions at the bottom of the page for each item. Each item will have its own drawing. I will close comments on Sunday, September 30, 2012. On Monday, 1 October, 2012 I will draw names for each of the prizes using a random number generator. Once the names are drawn, I will announce it in the blog and attempt to contact the winner of each item to obtain shipping information. If I do not hear from a winner withing 48 hours, I will draw a new name. The prizes will be sent off later that week, depending on getting my kids and the weather to cooperate for the 45 minute walk it takes to get to and from the post office.
Phew. Okay, are you ready to see the second prize? Here it is:
Prize 1: Black and White Owl Mini-Pillow

How to enter:
You can do as many or as few of the instructions below as you would like. Each item on the list counts as a separate entry. Be sure to leave a separate comment for each instruction.
1. Leave me a comment saying you love the bird.
2. Subscribe to the blog using the button in the column at the right. Leave me a comment about it.
3. Like my facebook shop page: BunniPhishCrafts. Leave me a comment about it.
4. Share the BunniPhishCrafts facebook post about the giveaway. Leave me a comment about it.
5. Visit my etsy shop. Leave me a comment about what item is your favorite, and what types of things you would be interested in seeing, even if you don't think I can make them.
If you are not able to leave a comment, send me an email at etsybunniphish@gmail.com - one email for each instruction.
In case you missed the giveaway information yesterday, you can find it here.
Ready? Set? GO!!!
Tuesday, September 18, 2012
Make Do and Sew
I have in my linen closet right now a bunch of towels that are... not quite worn out, but not very attractive. When I grow up (or, ya know, when my kids do) I would like to have nice towels. The kind you don't mind displaying in your bathroom. The kind that don't have bleach/hair dye stains, parts that are threadbare, things like that. But right now, that is not the reality. Right now I have two littles who believe it is their right to wear towels as capes, use them to build forts, occasionally use them as sleds/gurneys to drag their toys around...
Occasionally a towel takes more abuse than it can handle, and it gets pulled out of rotation. It gets a hole or the edges fray beyond what I am willing to put up with. What to do with these broken towels? I am definitely not going to throw them away - they are still useful.
I decided to do make washable menstrual pads with mine. I made one back when I was in college, but I need more. So I made one. I took the shape idea from Lunapads and went from there. And I found a very informative video on how to take care of cloth pads, so you don't need to be worried about not knowing ho
Materials:
An old towel (a hand towel is fine, or even a washcloth)
Paper
1 yd bias tape - you can make your own
A snap or velcro
Thread
Tools:
Scissors
Pins
Hand needle
Sewing machine (optional)
1. Cut your paper into a square. The diagonal of the square should be roughly the desired length of the finished pad.
2. With the paper folded in half, round all the corners.

3. Fold the paper into fourths. Cut a rounded right triangle from the edge. In the picture below, the wider part will be the pad, and the thinner part will be the wing.

4. Unfold. Pin the pattern to your towel.

5. Cut around the pattern.

6. Unpin the pattern. Sew the bias tape around the edges of the pad to keep them from fraying. As you can see, I wasn't too worried about how pretty the bias tape looked. I assume not a lot of people will be looking at it once it is in use.
7. Sew the snaps on the wings. Things I have learned the hard way when working with fastenings:
Sew one on the top side of one wing, and one on the bottom side of the other wing. Make sure you have the correct indents and post facing out before you sew down. Sew down one, then check the placement of the other before you sew down.


*The "Make Do and Mend" movement came about during WWII, when not only food but also clothing was rationed. You can read more about this here and here. I was inspired by Cast-On series 8 to work on this theme for the week.
Occasionally a towel takes more abuse than it can handle, and it gets pulled out of rotation. It gets a hole or the edges fray beyond what I am willing to put up with. What to do with these broken towels? I am definitely not going to throw them away - they are still useful.
I decided to do make washable menstrual pads with mine. I made one back when I was in college, but I need more. So I made one. I took the shape idea from Lunapads and went from there. And I found a very informative video on how to take care of cloth pads, so you don't need to be worried about not knowing ho
Materials:
An old towel (a hand towel is fine, or even a washcloth)
Paper
1 yd bias tape - you can make your own
A snap or velcro
Thread
Tools:
Scissors
Pins
Hand needle
Sewing machine (optional)
1. Cut your paper into a square. The diagonal of the square should be roughly the desired length of the finished pad.
2. With the paper folded in half, round all the corners.

3. Fold the paper into fourths. Cut a rounded right triangle from the edge. In the picture below, the wider part will be the pad, and the thinner part will be the wing.

4. Unfold. Pin the pattern to your towel.

5. Cut around the pattern.

6. Unpin the pattern. Sew the bias tape around the edges of the pad to keep them from fraying. As you can see, I wasn't too worried about how pretty the bias tape looked. I assume not a lot of people will be looking at it once it is in use.
7. Sew the snaps on the wings. Things I have learned the hard way when working with fastenings:
Sew one on the top side of one wing, and one on the bottom side of the other wing. Make sure you have the correct indents and post facing out before you sew down. Sew down one, then check the placement of the other before you sew down.


Note that this does not have a waterproof lining. For me, that doesn't matter. I have a collection of underwear I only wear while bleeding, and since they are all black, I don't care if a little blood gets on them. If you care, put a nylon backing on. Or you could make the central pad part thicker by adding more layers of towel to that part. Or you could make the central part a pocket, and make inserts to put in it. You could also add elastic bands to hold inserts in place. These are really quick and easy to make, and very customizable.
Other ideas:
- Many animal shelters will accept old towels, blankets and sheets to be used as animal bedding.
- Michele at Michelemademe did a series on how to reuse an old towel. She got 5 projects out of one bath towel. To see, click here and scroll down to series 9.
- Google it! There are plenty of lists on what to do with old towels.
*The "Make Do and Mend" movement came about during WWII, when not only food but also clothing was rationed. You can read more about this here and here. I was inspired by Cast-On series 8 to work on this theme for the week.
Wednesday, September 12, 2012
My first sewn purse
This week's sewing post is brought to us by my senior year in high school. This is the story of my favorite purse of all time.
I had an independent study art class, and I decided I wanted to make myself a purse. I found the most fantastic fabrics in the art supply stash area, and drew out a sketch. I wanted the purse to be reversible, and to have a pocket for my phone on the inside and outside. I needed my purse to be able to hold my planner (supplied by the school and mandatory if I wanted to move out of the classroom at any time), my graphing calculator, my journal, and whichever book I happened to be reading. Since most I the books I was reading at the time were fantasy novels on the thicker side (Daughter of the Forest by Juliet Marillier, 560 pages; Kushiel's Dart by Jacqueline Carey, 912 pages; The Bone Doll's Twin by Lynn Flewelling, 544 pages), I decided I needed to make the purse into a box shape, rather than a pocket shape. I figured pens and lip gloss could figure out their own space at the bottom.
I drew out the pieces I would need directly onto the fabric using a ball point pen. I used safety pins to hold the seams together as I sewed by hand (I didn't have access to a sewing machine). I used the backstitch for every seam. I figured out how to make every feature I wanted work. I think it took me nearly a month to sew the entire thing. It was a simple design compared to things I make now, but I was so proud of it. I used it EVERY day, and it was much complimented by my friends.
A week before graduation, I went to a concert with my sister and best friend. Well, my sister rode with different people, so we met up with her once we got there. My ride to the concert was awful; my best friend had secured us a ride with her current boy-thing and his friend - a guy who had tried to kiss me, then got pissed when I told him I had a boyfriend. On top of being in an awkward social situation, we had to lay in the back of his mini van, which had no seats, so that cops couldn't see us riding illegally. For TWO hours, while the jerk guy got lost.
The getting lost multiple times made us later than we had intended. We missed the opening band; I wasn't that upset, because I didn't even know who they were. My sister said they were pretty good, but not great. Then she told me something I found devastating. The first 50 people to buy the new album of the headliner, Orgy, would meet the band after the concert. Those albums with the special stickers on them were sold out by the time I arrived. Tragic.
Shortly after we arrived, the second band of the night, Godhead, took the stage. I didn't know any of their songs, so their set passed in a blur for me. They set up in the lobby, though, to sign autographs, so my sister and I went to meet them. I had paper in my purse, because I always have extra paper in my purse. We got the autographs and were about to leave the table, but the front man asked us to wait so he could talk to us some more. After he finished signing autographs, he got our email addresses and invited us to go backstage with the band. I thought about it for .00005 seconds, but declined even as my sister was agreeing. She was 16, I was 17, and I figured that even though we were being invited backstage to "talk", there would be expectations of activity other than talking.
Then Orgy took the stage, and I excused myself from the conversation.

The show was amazing. My sister fought some girl in the mosh pit over a towel the band threw, and she made it out with most of it. At one point, a few girls were handed up on stage with the band - I was one of them. The encore song was Stitches, my favorite ever song. Then the show was over, and my sister was going to the meet-and-greet. Before she went, she asked if I wanted them to sign something. I dumped out my purse and handed it to her.
This next part, I have to trust my sister on:
She told the group my birthday was the following week, so they sign their names and , the band name, and "Happy Birthday" on my purse. My sister told Jay Gordon, "My sister f***ing loves you!" and he said, "Tell your sister I f***ing love her too!" They also signed her ripped towel, and Paige Haley was amused/impressed by her efforts to obtain said towel.
My sister brought back stories and my purse, I put my stuff back in the bag, and then we went home.
I don't carry that purse anymore - it quickly became too small to hold all the things I needed to carry every day. I bought a shadow box for it, and now it hangs on a wall in my room. It definitely has the most interesting life story of any purse I own.

I had an independent study art class, and I decided I wanted to make myself a purse. I found the most fantastic fabrics in the art supply stash area, and drew out a sketch. I wanted the purse to be reversible, and to have a pocket for my phone on the inside and outside. I needed my purse to be able to hold my planner (supplied by the school and mandatory if I wanted to move out of the classroom at any time), my graphing calculator, my journal, and whichever book I happened to be reading. Since most I the books I was reading at the time were fantasy novels on the thicker side (Daughter of the Forest by Juliet Marillier, 560 pages; Kushiel's Dart by Jacqueline Carey, 912 pages; The Bone Doll's Twin by Lynn Flewelling, 544 pages), I decided I needed to make the purse into a box shape, rather than a pocket shape. I figured pens and lip gloss could figure out their own space at the bottom.
I drew out the pieces I would need directly onto the fabric using a ball point pen. I used safety pins to hold the seams together as I sewed by hand (I didn't have access to a sewing machine). I used the backstitch for every seam. I figured out how to make every feature I wanted work. I think it took me nearly a month to sew the entire thing. It was a simple design compared to things I make now, but I was so proud of it. I used it EVERY day, and it was much complimented by my friends.
A week before graduation, I went to a concert with my sister and best friend. Well, my sister rode with different people, so we met up with her once we got there. My ride to the concert was awful; my best friend had secured us a ride with her current boy-thing and his friend - a guy who had tried to kiss me, then got pissed when I told him I had a boyfriend. On top of being in an awkward social situation, we had to lay in the back of his mini van, which had no seats, so that cops couldn't see us riding illegally. For TWO hours, while the jerk guy got lost.
The getting lost multiple times made us later than we had intended. We missed the opening band; I wasn't that upset, because I didn't even know who they were. My sister said they were pretty good, but not great. Then she told me something I found devastating. The first 50 people to buy the new album of the headliner, Orgy, would meet the band after the concert. Those albums with the special stickers on them were sold out by the time I arrived. Tragic.
Shortly after we arrived, the second band of the night, Godhead, took the stage. I didn't know any of their songs, so their set passed in a blur for me. They set up in the lobby, though, to sign autographs, so my sister and I went to meet them. I had paper in my purse, because I always have extra paper in my purse. We got the autographs and were about to leave the table, but the front man asked us to wait so he could talk to us some more. After he finished signing autographs, he got our email addresses and invited us to go backstage with the band. I thought about it for .00005 seconds, but declined even as my sister was agreeing. She was 16, I was 17, and I figured that even though we were being invited backstage to "talk", there would be expectations of activity other than talking.
Then Orgy took the stage, and I excused myself from the conversation.
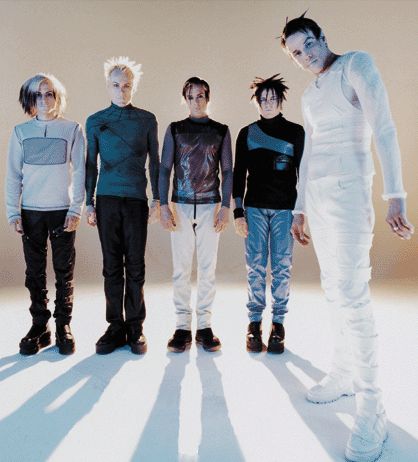
The show was amazing. My sister fought some girl in the mosh pit over a towel the band threw, and she made it out with most of it. At one point, a few girls were handed up on stage with the band - I was one of them. The encore song was Stitches, my favorite ever song. Then the show was over, and my sister was going to the meet-and-greet. Before she went, she asked if I wanted them to sign something. I dumped out my purse and handed it to her.
This next part, I have to trust my sister on:
She told the group my birthday was the following week, so they sign their names and , the band name, and "Happy Birthday" on my purse. My sister told Jay Gordon, "My sister f***ing loves you!" and he said, "Tell your sister I f***ing love her too!" They also signed her ripped towel, and Paige Haley was amused/impressed by her efforts to obtain said towel.
My sister brought back stories and my purse, I put my stuff back in the bag, and then we went home.
I don't carry that purse anymore - it quickly became too small to hold all the things I needed to carry every day. I bought a shadow box for it, and now it hangs on a wall in my room. It definitely has the most interesting life story of any purse I own.

Thursday, September 6, 2012
How To: Make a Change purse

It's sewing Thursday! I did the actual sewing on Tuesday, according to plan, and then my body was like, "Girl, did you forget that you are female? Don't worry, I will remind you all week. With a headache." My evil headache has subsided, so now I can show you this super easy, anyone with a little patience can do it, project.
To make a 3"x4" change purse, you will need:
Materials:
A piece of material, cut to measure 8"x4.5"
A button, or other closure
Thread
Tools:
Scissors
Pins
Hand needle
Sewing machine (optional)
1. Lay your rectangle of fabric face down. Fold the edge of one of the short sides over 1/4" to make a hem for the bag. Pin it, then sew the hem down. If you are sewing the bag by hand, I recommend using a backstitch - it makes a stronger stitch than a running stitch, and a neater finish than a whip stitch.
2. Turn the fabric over so the pretty side is now facing you. Position the hem you just made at the bottom of the rectangle. Fold the bottom up 3". Pin at the sides; sew along the sides from the hem to the new fold, 1/4" from the edge.

3. Turn the pocket right-side out. Cut the two top corners at about a 45 degree angle to cut out bulkiness. Fold the sides of the flap down to correspond with the sides of the pouch, about 1/4". Pin, then sew.

4. Fold the top hem down 1/4". Pin, then sew.


5. Fold the flap in half by pulling the hem down. Carefully make a small vertical slit in the center of the flap. Open the fold and increase the cut to be just large enough for the button to pass through.

5. Use the buttonhole stitch around the cut to keep your fabric from fraying. Position the button to be directly under the lit when the flap is folded over. Sew the button in place.

6. Love your new versatile pouch, and fill it with all sorts of things - your I.D. and credit card when going out, business cards, packets of moist wipes swiped the next time you go to a bbq place... or just your spare change.

If you would like a change purse but don't want to make your own, you can look in my etsy shop or contact me with a request and I will do my best to find a fabric and closure you will love.
Tuesday, August 14, 2012
Undies from T-shirts: a how-to
Happy Sewing Tuesday! I am SUPER excited about today's post - hopefully you will be too.
You know that pair of undies that makes you want to dance around the house when you put them on, because they are that awesome? I know you do. Everyone has them. Except people who don't wear undies... This post will probably be less exciting for you.
Back to what I was saying, before I thought about how sad it is that some people might not have favorite undies. Favorite pair of awesome undies. Best feeling ever when you put them on. Are we back to feeling awesome about our undies? Good. Now it is time for more sad. You know that feeling when you realize your favorite undies now have a hole, and you should probably stop wearing them? Yeah, me too. Happened with my favorite undies.

Rather than be sooooo sad because I can't find this exact cut of undies in stores, I did the logical thing and made new, even more awesome undies! Ready to find out how to do it? Of course you are.
Note: My favorite undies were cotton, and similar to my lighter-weight t-shirts. If your favorite pair of undies are stretchy lace, you might want to check the Happy Seamstress out.
To make new undies, you will need:
Materials:
An old pair of undies, past its prime
Old t-shirt(s) that are past their prime but still have good fabric
Tools:
Seam ripper (optional)
Scissors
Straight and/or safety pins
Sewing machine and/or hand needle and thread

How to:
1. Take your old undies and look at the construction. What makes them your favorite? For me, I loved the seam down the front, the elastic in the waistband, and the way the leg holes were cut. Make sure you know what you want before you start cutting.
2. Cut your undies to make a template. I snipped the waist elastic out of my old undies, then separated the front from the back. You can use a seam ripper if you want things to be really precise; I chose scissors because it was faster and I didn't plan on putting the undies back together again. I set aside the back of the undies, and cut the front down the center. Cut out a little liner piece.


 6. Slip undies on, and feel like dancing all around your house.
You know that pair of undies that makes you want to dance around the house when you put them on, because they are that awesome? I know you do. Everyone has them. Except people who don't wear undies... This post will probably be less exciting for you.
Back to what I was saying, before I thought about how sad it is that some people might not have favorite undies. Favorite pair of awesome undies. Best feeling ever when you put them on. Are we back to feeling awesome about our undies? Good. Now it is time for more sad. You know that feeling when you realize your favorite undies now have a hole, and you should probably stop wearing them? Yeah, me too. Happened with my favorite undies.

Rather than be sooooo sad because I can't find this exact cut of undies in stores, I did the logical thing and made new, even more awesome undies! Ready to find out how to do it? Of course you are.
Note: My favorite undies were cotton, and similar to my lighter-weight t-shirts. If your favorite pair of undies are stretchy lace, you might want to check the Happy Seamstress out.
To make new undies, you will need:
Materials:
An old pair of undies, past its prime
Old t-shirt(s) that are past their prime but still have good fabric
Tools:
Seam ripper (optional)
Scissors
Straight and/or safety pins
Sewing machine and/or hand needle and thread

How to:
1. Take your old undies and look at the construction. What makes them your favorite? For me, I loved the seam down the front, the elastic in the waistband, and the way the leg holes were cut. Make sure you know what you want before you start cutting.
2. Cut your undies to make a template. I snipped the waist elastic out of my old undies, then separated the front from the back. You can use a seam ripper if you want things to be really precise; I chose scissors because it was faster and I didn't plan on putting the undies back together again. I set aside the back of the undies, and cut the front down the center. Cut out a little liner piece.

3. Lay your template pieces on the t-shirt(s). Pin the template down in several spots so the pieces won't shift while cutting. Cut around the template pieces, leaving seam allowance.
A couple hints:
-If you are making undies that have two symmetrical pieces to make the front, place two layers of t-shirt together, pin the template on top of both, and cut both pieces at the same time.
-If you are going to run the old elastic through the band and want it to be covered, you can line up the top of the undies with the bottom seam of the t-shirt and run the elastic through the resulting tube.
-If your t-shirt does not have a tube seam at the bottom and you want one, leave enough fabric at the top of the undies to fold over and make one.


4. Begin pinning and sewing, following this order:
a. front center *
b. all the places the front and back meet - sides, crotch
c. pin in the liner-thing at the crotch
d. roll the leg opening hems, catching the liner. sew.
e. thread the elastic into the tube. sew your tube closed - I used a hand needle for this part.
*Do NOT sew the tube closed before you insert the elastic. To avoid this problem, stop sewing as soon as you reach the stitching for the tube.

5. Add any wanted embellishments, like a painted rocket ship in order to make your undies into lucky rocket ship undies.

Tuesday, August 7, 2012
Sewing Tuesday - 2
Hello Tuesday! I hope you had a good week - I did.
I finished up the bag I donated for the Tour de Fleece prize.


The bag has a cotton exterior and corduroy interior. There is a kindle fire pocket, an 8"x5" zippered pocket, a 5"x5" zippered pocket, and a cell phone pocket. It has a zipper closure at the top.
Sorry, this is a really short entry. I am exhausted. Better next week. I promise.
Sunday, August 5, 2012
Weekly Check-In
Hello, Sunday! It is time that time again.
Blog Stuff:
I started Sewing Tuesday, and I liked how it turned out. The next installment should be pretty good, too. I am mulling over having a regular Saturday piece, too. Undecided on whether to have three days a week scheduled, though. I need to do a little more research on my idea first.
New from the babies:
I saw Mara, almost 2, decide to share without prompting. I set down a handful of cherries for each child on the coffee table. Gabriel was on the couch playing with a helicopter and didn’t notice. Mara picked up a cherry, brought it almost to her mouth, and then looked at Gabriel. She walked over to the couch and said, “Here,” holding the cherry to Gabriel. My heart melted a little bit.
Crafty things:
This area is going to be a little stark this week... Next week's should be more full. I have started several projects since the first.
Finished the project bag - more on this on Tuesday.

Two Ravellenic challenges completed! Mandi's hat and mom's socks:


For the coming week:
I need to finish the blue baby blanket. I will finish spinning the blue merino singles. I need to do two of the squares for Rachel's afghan. I want to finish a project bag that I am crocheting. I started the skew socks and want to get past the toes for both.
In the mail:
For Tour de Fleece, I was on a team that decided to do prizes withing the team. I donated the above project bag; Bobbie Joe donated alpaca. I won a one-pound lot of alpaca!

Wednesday, August 1, 2012
August Crafting
For the past few months at about this time, I have been writing what WIPs I want to finish during the month. This month, I am going to to it a bit differently. I have quite a list of projects to tackle, but not all of them are WIPs. Some of them are just ideas. I'll put the things without pictures first:
-I need to finish that project bag A.S.A.P. Hopefully tomorrow.
-I will be making another project after the Ravellenic Games end.
-I would like to piece together half of Steve's quilt top.
-I want to cut the pajamas for Mandi's kids.
-I am making a mitten garland for a barter, and would like to finish that this month.
-I need to finish my Nerd Wars dissertation. In other Nerd Wars news, I have figure out 4 of the 6 challenges today: my Ravellenic WIPs for one, a bag I am making for a swap for the second, a market bag for the third, and a pair of toe socks for the forth.
-Make a quilt top for Craft Hope - Project 18 so i can finish the quilt and send it in September.
There are 3 new square patterns for my CAL, which means 4 more squares. If I can manage to do one square a week, I will be great. The patterns are Shape shifting in 12, Moon Granny Square, and The Crocodile Flower.
I am going to participate in a KAL during August and September to make non-vanilla socks with self-striping yarn. I plan to use the pattern Skew with this yarn, and will be casting on sometime this month.

For the Ravellenic Games, I have two projects to go - Diagonal Lace Socks for my mom, and the blue baby blanket.


Hopefully all will go well, craft wise, even though I will be travelling at the end of the month for a wedding. Wish me luck; I will need it.
Tuesday, July 31, 2012
Sewing Tuesday
I said I was going to do it, so here we go! My new Tuesday thing will be pulling down my sewing machine and working with it. If I don't schedule it, I could go a month or more without touching it - which would be a tragedy.
You may have noticed that I said I pull down my sewing machine. In an ideal world, I would have a pet-free, baby-free studio with my materials all on display, several windows for great natural light, and a dedicated sewing table. In the real world, my sewing machine spends most of the time on top of a book shelf in my living room. When I want to use it, I pull it down, and work on the dining room table. My sewing box lives on the shelf below the sewing machine, and my thread lives under a coffee table in the living room, and my notions live under my bed in a basket, mostly in a tackle box. My fabric lives in two boxes in the basement. My cutting mat and bolt of muslin live next to the book shelf.

Today I worked on several components of a bag I am making - pink floral exterior and pockets, and a blue corduroy interior. However, since I didn't really finish anything, you will have to wait to see it.
Since I don't have any really cool things to show you, I will instead let you know what projects I have on my to-do list. Note: This list is just a starting point. I will be adding to it for sure.
TO DO:
Immediately:
-Finish Rachelle's bag
For Christmas:
-Quilt for Steve
-Pajamas for Kenny
-Pajamas for Robert
-Pajamas for Cecilia
Someday:
-Bag for the Ravellenic Games YTZ winner.
-Sewing machine cover
-Purse for Mer
Thursday, May 31, 2012
May WIP -> FO wrap up
So... how did I do this month?
FOs:
Aprons for Haiti - click here and scroll down a little to see how they turned out
Baby cable rib socks for Nos - Click here to see the finished product.
Sparkly Arm Warmers - click to see the shininess!
Belly dancer skirt/belt for MariLee - Click to see the first FO of the month
Pig Purse - Click to see the adorable piggy bank inspired purse
That is FIVE FOs! An extra one! Yay!
So... what about the rest of the list?
My list of (still) WIP:
Sock yarn shawl - Though the shawl more than doubled in size, I still have a long way to go. This will be my focus piece this month (even though I have a ton planned - come see me tomorrow to find out more!)

Quilt for Steve I sewed several squares together, but have many more to go. Good thing this is a Christmas present...

Blue Baby Blanket I did not even touch this. No worries, though - I am taking part in an event on ravelry.com that will require me to finish a WIP in less than 17 days. This is my pick!


Bathroom rag rug I barely even looked at it this month. I think this project will have to wait until summer has passed - it is very hot to work on.

Wednesday, May 23, 2012
Two FOs and new WIP
I know, I said only small projects between FOs. But I couldn't not have a pair of socks on the needles, so... I started a new pair. First things first, though: two FOs.
Socks for Steve. I LOVE this yarn. It is Patons Kroy Ragg Shades. The colors and texture remind me of some flannels I used to wear in middle school. I plan on buying more and making a pair for myself, someday...

11 half-aprons for Craft Hope Project 17:Aprons for Haiti. It is really hard to give up two of them: The floral pattern with blue pockets, and the blue paisley background with the green pockets. But I have no need for a half-apron, and I try really hard not to have useless stuff just because I want it.

* * *
Now the new WIP. My sister sent me money to make her socks. I bought enough yarn to make two pairs of socks. A couple days later, I saw other yarn that I thought she would like even more. I let her choose which two she wanted.
There I was, minding my own business, kitchner stitching up the toe to Steve's socks, when this yarn started taunting me. "Come play with me," it said. I tried to resist, but I was powerless against it's charms. So I CO Saturday night, and worked on it at S&B on Sunday. I haven't touched it since, but I keep looking at the sock. I know it is just waiting patiently for this Sunday.


Tuesday, May 1, 2012
May: Whipping WsIP to FOs
Since I did such a good job having a theme in April, I think I will try having a theme for May, too. This month I will turn at least four of my Works In Progress into Finished Objects. That is one project done a week. Probably doable. Especially since I am giving myself a rule: I can not start a new project unless I finish a current WIP. This means only ONE new project for each project finished. Even little projects count.
My list of WsIP:
Sock yarn shawl This is for a swap, and it has to be done by the end of May. ETA: June. I just asked my partner for an extension. She is making a similar shawl, and she is nowhere near done, either. It is 6 feet wide, and will be 18 inches long when done. It is 1.5 inches long right now...

Aprons for Haiti For more info, visit here. I have 11 half-aprons cut. I need to get something for the ties - I'm thinking 3" ribbon. They need to be sent out by May 31st.

Quilt for Steve Seriously doubt this is going to be on my list of FOs at the end of the month, but hopefully I can make pretty decent progress. Almost all the pieces are cut, so now I'm working on sewing the squares together.

Blue Baby Blanket I started making this for a friend of my SIL, but then she had a girl. So I made a pink blanket instead. This one has been sitting next to my craft are for several months now. I keep looking at it, then deciding I am not interested. If I have a deadline, though... maybe I can talk myself in to finishing? It's a little over 25% done. 14/50 inches


Sparkly Arm Warmers Arm warmers for my friend Melissa. She bought the yarn for them back in September! These should probably make it on to the list at the end of the month... The first warmer is up to the thumb gusset.

Bathroom rag rug More than half done! I wanted to finish it last month, but... it is a bigger project than I originally thought. If I knock out a little bit everyday, though, I should finish it by the end of the month.

Baby cable rib socks for Nos Started these socks on April 22. It would be good if they got done this month, since I have 10 other pairs of socks to make people by Christmas, and I would eventually like to make a pair for myself. I have yarn for three pairs for me just waiting... ETA: My sister just sent me some money to knit her some socks, too... So depending on how fancy of yarn she wants, I will be adding 1-3 more pair(s) to my list of socks to do.

Belly dancer skirt/belt for MariLee Need to finish up the detailing. I should have finished this about two years ago, but I couldn't find appropriate coins. Maybe I can find some now? Or I can just change my original design...

My list of WsIP:
Sock yarn shawl This is for a swap, and it has to be done by the end of May. ETA: June. I just asked my partner for an extension. She is making a similar shawl, and she is nowhere near done, either. It is 6 feet wide, and will be 18 inches long when done. It is 1.5 inches long right now...

Aprons for Haiti For more info, visit here. I have 11 half-aprons cut. I need to get something for the ties - I'm thinking 3" ribbon. They need to be sent out by May 31st.

Quilt for Steve Seriously doubt this is going to be on my list of FOs at the end of the month, but hopefully I can make pretty decent progress. Almost all the pieces are cut, so now I'm working on sewing the squares together.
Blue Baby Blanket I started making this for a friend of my SIL, but then she had a girl. So I made a pink blanket instead. This one has been sitting next to my craft are for several months now. I keep looking at it, then deciding I am not interested. If I have a deadline, though... maybe I can talk myself in to finishing? It's a little over 25% done. 14/50 inches
Sparkly Arm Warmers Arm warmers for my friend Melissa. She bought the yarn for them back in September! These should probably make it on to the list at the end of the month... The first warmer is up to the thumb gusset.

Bathroom rag rug More than half done! I wanted to finish it last month, but... it is a bigger project than I originally thought. If I knock out a little bit everyday, though, I should finish it by the end of the month.
Baby cable rib socks for Nos Started these socks on April 22. It would be good if they got done this month, since I have 10 other pairs of socks to make people by Christmas, and I would eventually like to make a pair for myself. I have yarn for three pairs for me just waiting... ETA: My sister just sent me some money to knit her some socks, too... So depending on how fancy of yarn she wants, I will be adding 1-3 more pair(s) to my list of socks to do.

Belly dancer skirt/belt for MariLee Need to finish up the detailing. I should have finished this about two years ago, but I couldn't find appropriate coins. Maybe I can find some now? Or I can just change my original design...

Subscribe to:
Posts (Atom)